Home > About
> Your Team
> Organisation
Team Organisation
On this page we share a few tips on how to organise a survival swimming and lifesaving team.
Training Venues
Phone the local swimming pool, tell them you're looking for a training facility for survival swimming and lifesaving, and ask about their dress code. You need a pool where you can swim in clothes. Most pools only allow clothes of man-made fibres like nylon or polyester, to protect their filters from fluff. These clothes also dry faster.
Your training location and pool space may affect your lesson plans and require some adjustments, but it is important to be aware that the order of the topics is part of the whole course design.
For outdoor training, check out the local beaches or lakes.
Seek sheltered and safe spots where you can swim.
Bring some ponchos for warm-up during breaks, and as portable changing rooms.
Plan Your Lessons
Lessons can be the main fun activity of your team, if you organise them right. People learn more when they enjoy themselves. Use that to their advantage.
Lesson plans provide a basic framework for planning your class. They include a template for creating a detailed plan for each lesson.
Your lesson plan should follow a logical progression of skills over 10 lessons including the introduction of new skills and multiple practice sessions. Repeat essential points in following lessons.
Your plan should include teaching and practice activities, diagrams of formations, equipment needed and the time planned for each activity. Your plan should also include room for notes to consider for your next lesson.
We've arranged the pages of this website so you can quickly build lesson plans from them. Simply print the pages and share them with your team.
Organise Events
Most teams are event driven.
Use the Internet for communications between team members.
Setup a Twitter account to keep in touch and announce upcoming events.
Contact all your friends and other people you know.
Tell them when and where the first swimming session is planned.
That's it. Easy.
Instructors and Swimming Teachers
Your team should have instructors for water survival and lifesaving training. They can explain, demonstrate in the water, and evaluate all skills. The ideal instructor-to-student ratio during training and assessments is one to six.
Instructors should be strong swimmers who are competent in all the water survival skills shown in this publication.
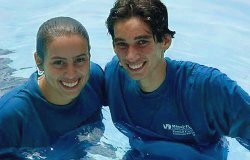
Lead by Example
Swimming and lifesaving lessons often require that the teacher joins
the class in the pool to demonstrate a certain skill.
It shows that you are not shy of the water and can do what you teach.
You become more part of the team, rather than preaching from the pool side.
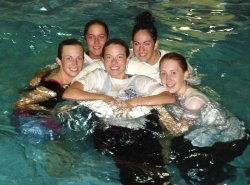
Young and Old Buddy System
Two teachers or more working as a team are better than one. This works best when young teachers follow an experienced teacher, also called "shadowing".
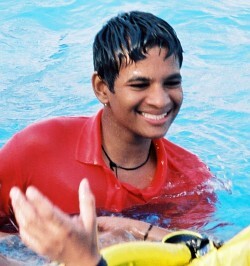
Teacher Uniforms
Swimming teachers need to be recognised easily by students, lifeguards, and other pool users. Bright colours work best in a pool. Avoid blue clothes as they hide where your are.
They usually wear a uniform consisting of shorts or long pants, and a shirt with the pool operator's logo or your team logo. This quick drying outfit should be comfortable on pool-side and in the water.
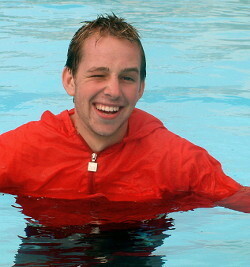
Lifeguard Supervision
Lifeguards should watch your activities at all times. You can't teach and supervise the pool at the same time, you will be too busy with your training or teaching that you may miss what happens around you. Lifeguards look out for you and alert you if needed.
Although it may not be required, instructors should hold either the American Red Cross Lifeguard Training certificate or equivalent.
If several teachers hold lifeguard qualifications,
they can take turns with watching the pool and teaching in the water.
Also, give the lifeguards a chance to cool off in the pool when you take a break.
This makes it all much more fun.